AWS サーバー

【AWS/Apache】Let'sEncryptSSL更新手順【新規でもOK】


こんにちは。ふわふわしょうちゃんです。


「Let’sEncrypt」は、無料でSSL証明書を発行してくれるサービスです。

個人メディアなどで、複数ドメインを運営していると、それなりに費用が掛かってしまいます。

無料なら、利用したいですよね。


SSL証明書の有効期限は有償のサービスと比べ、90日と短いですが、自動更新も含めて、手順を残しておきたいと思います。

僕は、今回、新規ではなく、更新の作業でしたが、AWS公式ドキュメントに沿っているので、新規取得の方でも大丈夫だと思います。


想定環境

AWS EC2インスタンス

OS: AmazonLinux2

ミドルウェア: Apache


Let’sEncryptのSSL証明書更新エラー

Les’sEncryptのSSL証明書を更新するためにCertbotというパッケージがありますが、現状、AmazonLinux2は公式にサポートされていません。

僕は、新規証明書発行時は、別のやり方でCertbotをセットアップしていて、先日、更新作業時に、パッケージの依存関係で下記のエラーが発生しました。

Exiting abnormally:
Traceback (most recent call last):
  File "/opt/eff.org/certbot/venv/bin/letsencrypt", line 11, in <module>
    sys.exit(main())
  File "/opt/eff.org/certbot/venv/lib/python2.7/site-packages/certbot/main.py", line 15, in main
    return internal_main.main(cli_args)
  File "/opt/eff.org/certbot/venv/lib/python2.7/site-packages/certbot/_internal/main.py", line 1357, in main
    return config.func(config, plugins)
  File "/opt/eff.org/certbot/venv/lib/python2.7/site-packages/certbot/_internal/main.py", line 1237, in certonly
    lineage = _get_and_save_cert(le_client, config, domains, certname, lineage)
  File "/opt/eff.org/certbot/venv/lib/python2.7/site-packages/certbot/_internal/main.py", line 121, in _get_and_save_cert
    lineage = le_client.obtain_and_enroll_certificate(domains, certname)
  File "/opt/eff.org/certbot/venv/lib/python2.7/site-packages/certbot/_internal/client.py", line 435, in obtain_and_enroll_certificate
    self.config)
  File "/opt/eff.org/certbot/venv/lib/python2.7/site-packages/certbot/_internal/storage.py", line 1013, in new_lineage
    "archive directory exists for " + lineagename)

色々試したのですが、結論、詰み状態になりました。ですが、AWS公式ドキュメントが見つかり、改めて構築しなおす形にしました。

ちなみにエラーが起きたCertbot群は全て削除済みです。


一応削除したリスト

  • /usr/bin/certbot-auto
  • /opt/off.org

始めてSSL証明書を発行する方は、以降を参考にしてください。


EPEL7 パッケージダウンロード/Apache設定

AWS公式ドキュメント

https://docs.aws.amazon.com/ja_jp/AWSEC2/latest/UserGuide/SSL-on-amazon-linux-2.html#letsencrypt


ここから、Linuxコマンドを使用するので、Linuxコマンドに慣れていない方は、こちらの記事も参考にしてください。


以下、作業開始前にバックアップしておきます。

  • EC2インスタンスのAMIを作成
  • /etc/httpd/conf/httpd.conf または、/etc/httpd/conf.d/ssl.confとバーチャルホスト関連のconfファイルをバックアップする。


step
1
EPELをダウンロード

cd コマンドで、/home/ec2-user ディレクトリへ移動してください。

移動後、以下のコマンドでダウンロードを行います。

[ec2-user ~]$ sudo wget -r --no-parent -A 'epel-release-*.rpm' http://dl.fedoraproject.org/pub/epel/7/x86_64/Packages/e/


step
2
ダウンロードしたリポジトリパッケージをインストール

[ec2-user ~]$ sudo rpm -Uvh dl.fedoraproject.org/pub/epel/7/x86_64/Packages/e/epel-release-*.rpm


step
3
EPEL が有効であることを確認

[ec2-user ~]$ sudo yum repolist all

以下のような項目が確認できれば、OKです。

epel/x86_64 Extra Packages for Enterprise Linux 7 - x86_64 enabled: 12949+175 epel-debuginfo/x86_64 Extra Packages for Enterprise Linux 7 - x86_64 - Debug enabled: 2890 epel-source/x86_64 Extra Packages for Enterprise Linux 7 - x86_64 - Source enabled: 0 epel-testing/x86_64 Extra Packages for Enterprise Linux 7 - Testing - x86_64 enabled: 778+12 epel-testing-debuginfo/x86_64 Extra Packages for Enterprise Linux 7 - Testing - x86_64 - Debug enabled: 107 epel-testing-source/x86_64 Extra Packages for Enterprise Linux 7 - Testing - x86_64 - Source enabled: 0


step
4
Apache のconfファイルを編集

既にバーチャルホストなどの定義をしている場合、ここの作業は不要。

<VirtualHost *:80> DocumentRoot "/var/www/html" ServerName "example.com" ServerAlias "www.example.com" </VirtualHost>

ここで設定するServerNameServerAliasに対し、この後、インストールするCertbotがSSL証明書を発行するかどうかを確認してくれます。


step
4
confを変更した場合は、Apacheを再起動

[ec2-user ~]$ sudo systemctl restart httpd

バックグラウンドなどで処理をしている場合、reloadでも可。


Certbotインストールと実行

step
1
Certbot パッケージと依存関係をインストール

[ec2-user ~]$ sudo yum install -y certbot python2-certbot-apache


step
2
Certbotを実行

[ec2-user ~]$ sudo certbot

ここで、僕の場合は、すでにメールアドレスが登録済みだったので、以下の様に、ApacheのVirtualHostブロックで設定したドメイン名リストが表示されました。

初回の人はAWS公式を確認してください。

Which names would you like to activate HTTPS for? - - - - - - - - - - - - - - - - - - - - - - - - - - - - - - - - - - - - - - - - 1: ここにドメイン名リストが表示される。 - - - - - - - - - - - - - - - - - - - - - - - - - - - - - - - - - - - - - - - - Select the appropriate numbers separated by commas and/or spaces, or leave input blank to select all options shown (Enter 'c' to cancel):空のままエンター


そのまま、実行が続き・・


IMPORTANT NOTES: - Congratulations! Your certificate and chain have been saved at: /etc/letsencrypt/live/{ドメイン名}/fullchain.pem Your key file has been saved at: /etc/letsencrypt/live/{ドメイン名}/privkey.pem Your cert will expire on 日付. To obtain a new or tweaked version of this certificate in the future, simply run certbot again with the "certonly" option. To non-interactively renew *all* of your certificates, run "certbot renew" - If you like Certbot, please consider supporting our work by: Donating to ISRG / Let's Encrypt: https://letsencrypt.org/donate Donating to EFF: https://eff.org/donate-le


上手く更新してくれました!


SSL証明書期限確認

WEBブラウザでSSL証明書が上手く更新されているか確認します。


アドレスバーの先端に鍵のアイコンがあります。それをクリックすると以下のような表示がされます。

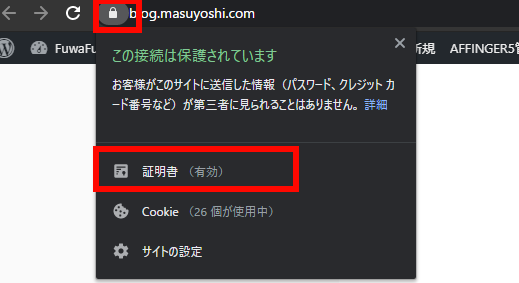
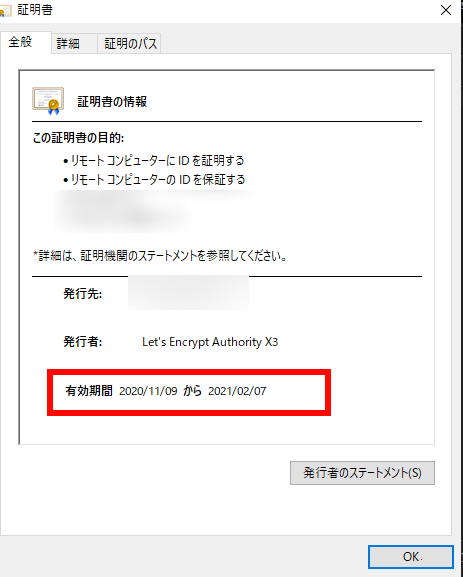
「証明書」をクリックするとSSL証明書期限などが確認できます。


また、デベロッパーツールで、全てセキュアが緑になっているか確認します。

F12を押して、デベロッパーツールを起動してください。

デベロッパーツール起動後、「Security」タグを選択します。

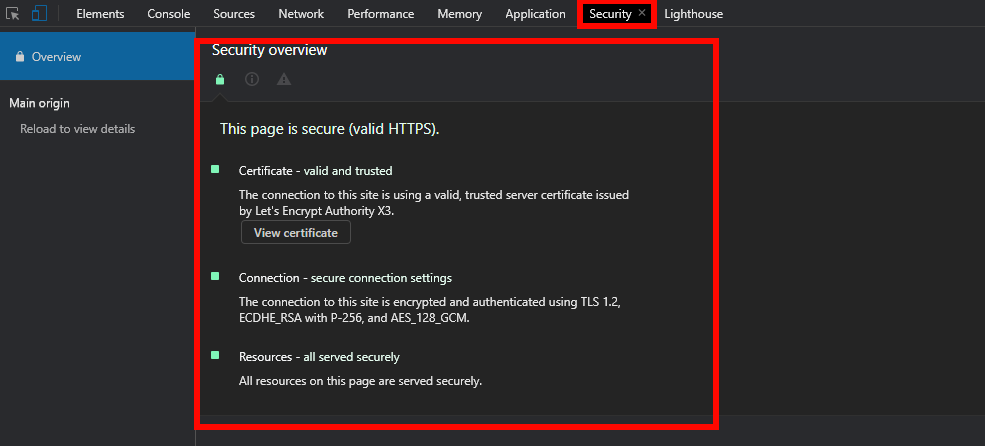
全て緑色になっていることを確認してください。ここで緑色以外になっていれば、脆弱性がある可能性があるので、SSL/TLSのバージョンなど、調査する必要があります


次は、SSL証明書更新の作業を自動化します。


SSL更新作業 をCronで自動化

step
1
Crontabコマンドを実行

$ sudo crontab -u root -e

以下を追記します。

0 0,12 * * * root certbot renew --no-self-upgrade

毎日0:00と12:00にroot権限で実行する、という形でいきます。

ちなみに、Certbot開発側は、一日に2回実行することを推奨しているようです。


step
2
Crontabが設定されているか確認

$ sudo crontab -u root -l

実行後、

0 0,12 * * * root certbot renew --no-self-upgrade


と、表示されればOKです。

これで作業は終了です。


最後に

やはり、Linux関連はパッケージの依存関係で、予期しないエラーに苛まれることが多いです。

AWS公式ドキュメントを探すまで、結構、時間が掛かってしまいました。


公式にサポートされていないのも、敷居を高く感じさせてしまう要素ですね。

いざ、やってみると、勉強にもなるので、是非、試してみてはいかかでしょうか。


じゃ、そーゆうことで!


-AWS, サーバー
-